¶ Custom Symbols
¶ Introduction
The RED CAD APP allows you to create your own symbols if you need a symbol that is not available in any toolbox. These are stored in your own toolbox. Your own toolbox is labeled “My Toolbox” in the RED CAD APP.
Symbols can be drawn in the RED CAD APP using the drawing tools or imported from other formats.
¶ My toolbox
¶ Opening
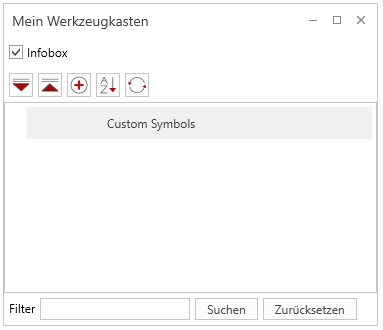
In the Toolboxes tab you will find your own toolbox on the far right, which can be opened by clicking on the My Toolbox button.

After clicking, the My Toolbox window opens, which, like all toolbox windows, can be freely positioned.
¶ Categories
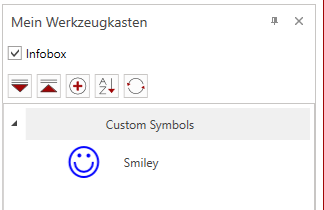
By default, the Custom Symbols category exists and as long as no further categories are added, all custom symbols will be saved in this category.
Adding/creating your own categories can be done using the plus icon.
¶ Create your own symbols
It is recommended to create your own symbols in a neutral document and then save this document. This document serves as a template file and the original form of the symbol can be used at any time to make adjustments.
Because once the symbol is saved to your toolbox, its appearance can no longer be changed.
¶ Creating
- Create a blank document
- Select the "Draw" tab
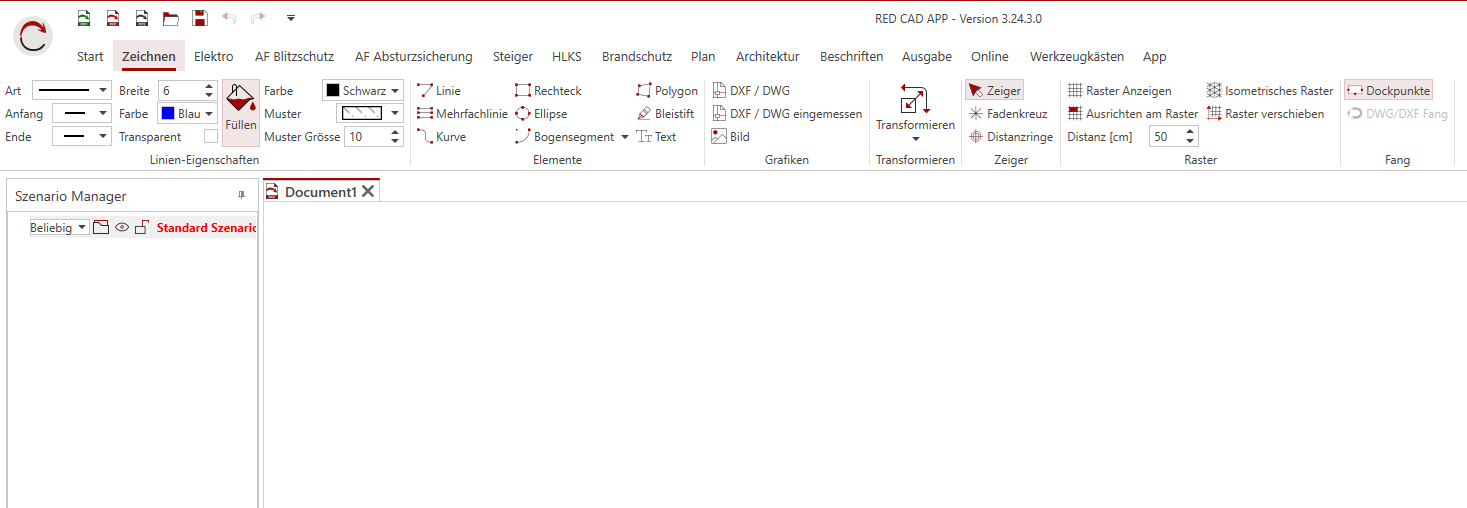
- Create your symbol, either using the drawing functions, by modifying an existing symbol via the properties, or by importing a graphic.
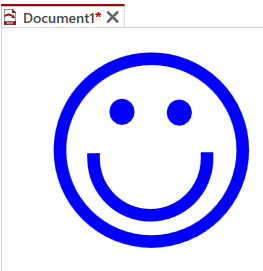
Here is an example symbol made of ellipses and an arc segment:
¶ Saving
Important for multiple elements: If the drawn symbol is composed of several elements (e.g. lines, text fields, etc.), the elements must be grouped before saving using the corresponding button in the segment "Transform" button, or with CTRL + G.
-
Right-click on the symbol and select "Save as symbol" in the context menu or click the "Save as symbol" button in the "Toolbars" tab in the "Custom symbols" segment
-
Select between Yes / No for Set insertion point


Note: The insertion point is the point at which a symbol is inserted and at the same time it is the rotation point / pivot point of a symbol.
Yes = setting the insertion point manually
Control for manual setting:
- Set the insertion point with the mouse pointer and left click
- With ENTER the set insertion point is confirmed
- The position of the insertion point is indicated with a dot (purple).
- The insertion point is removed using the R key
- The entire saving process is aborted with ESC.
or
No = Skip – insertion point is automatically placed in the center of the symbol.
- Select between Yes / No for Set dock points
Note: Dock points are connection points for cables. Symbols and lines can thus be linked to one another. Dock points are often used in schematic/wiring diagram.
Dock points are only used to make work easier and have no power flow or simulation function; this does not exist in the RED CAD APP.
Yes = Manual setting of dock points


Control when setting manually:
- Set dock points with the mouse pointer and left click - Repeat to set multiple dock points
- The set dock points are confirmed with ENTER
- Remove the dock points step by step using the R button
- The saving process is aborted with ESC.
- The positions of the dock points are displayed with green dots.
or
No = Skip – No dock points are set.
-
Define/enter symbol information
(detailed explanation under 3.3 - Symbol information) -
Click OK to save the symbol to your own toolbox
¶ Symbol information
The symbol information that can be stored when saving a symbol can also be changed after saving.
To make an adjustment, right-click on the corresponding symbol → Edit symbol within the toolbox.
Important: Your own toolbox is not a database!
If you view the information via the tool after a certain period of time Changing the toolbox does not automatically affect symbols already used in existing plans.This means: All instances of this symbol that were inserted into a plan before the change retain the old data. They are not automatically updated when the plan is opened.
To ensure that the updated data is used, the old symbols in the plan must be manually replaced with the current version from the toolbox.
-
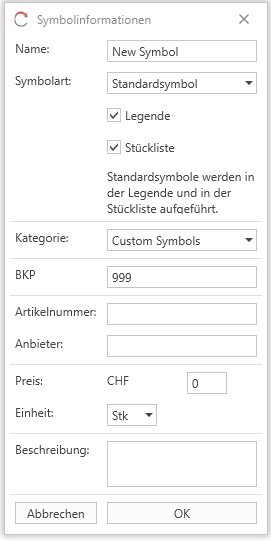
Name: Symbol name – Visible in the legend, parts list, and scenario manager
-
Symbol type: Type of symbol – Also controls the checkboxes in the legend or parts list. For schematic/circuit symbols, it is important that the symbol type is set to "Schematic symbol". Checkboxes can still be individually configured.
-
Category: Select the toolbox category in which the symbol is stored
Optional Information:
-
BKP: Construction Cost Plan Code – For Switzerland only
-
Item Number: Specific item number – this will be listed in the bill of materials
-
Vendor: Vendor/Supplier – this will be listed in the bill of materials
-
Price: Price per quantity – If prices are adjusted occasionally, it is recommended not to enter a price.
-
Unit: Unit of measurement for the symbol – The recommended unit is pcs.
-
Description: Custom description text – visible in the toolbox info box – Otherwise, not relevant
¶ Backup
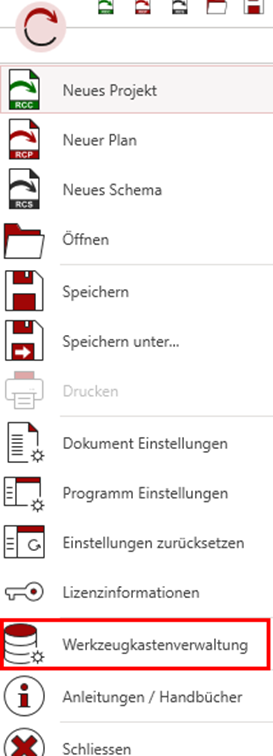
You can find the toolbox management via the main menu. This is used to manage your own toolbox, but not the integrated toolboxes.
Your own toolbox file is stored locally and can be lost if your computer is lost, your hard drive fails, or you change computers.
Therefore, it is recommended to create a backup file of your toolbox occasionally and save it to an external storage medium.
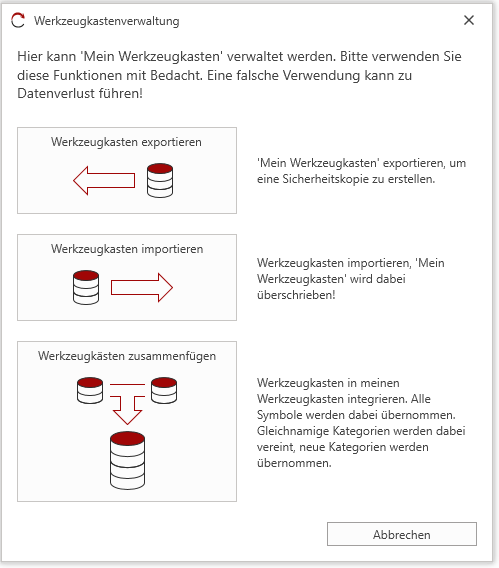
¶ Export Toolbox
Create a toolbox file to back up your My Toolbox.
-
Click Export Toolbox
-
Choose a location and define a filename for the toolbox file.
-
Click Save.
-
Confirm with Yes to start the export process.
-
When the message "Export completed successfully" appears, the toolbox file has been exported correctly.
¶ Import Toolbox
Importing a toolbox overwrites the existing toolbox file on your local system with the imported toolbox file.
This means that all symbols previously saved in your My Toolbox will be replaced by the symbols from the imported file.
-
Click Import Toolbox
-
Select the toolbox file to import
-
Click Open
-
Confirm with Yes to start the import process
-
If the message "Import completed successfully" appears, the toolbox file has been imported correctly.
¶ Merge Toolboxes
Merging integrates the imported toolbox file into the existing toolbox file on the local system.
-
Click Merge Toolboxes
-
Select the toolbox file to import
-
Click Open
-
Confirm with Yes to start the integration process
-
If the message "Integration completed successfully" appears, the toolbox file has been integrated correctly.
If the integrated icons are not immediately visible, click the "Refresh" icon in My Toolbox.