¶ Program View
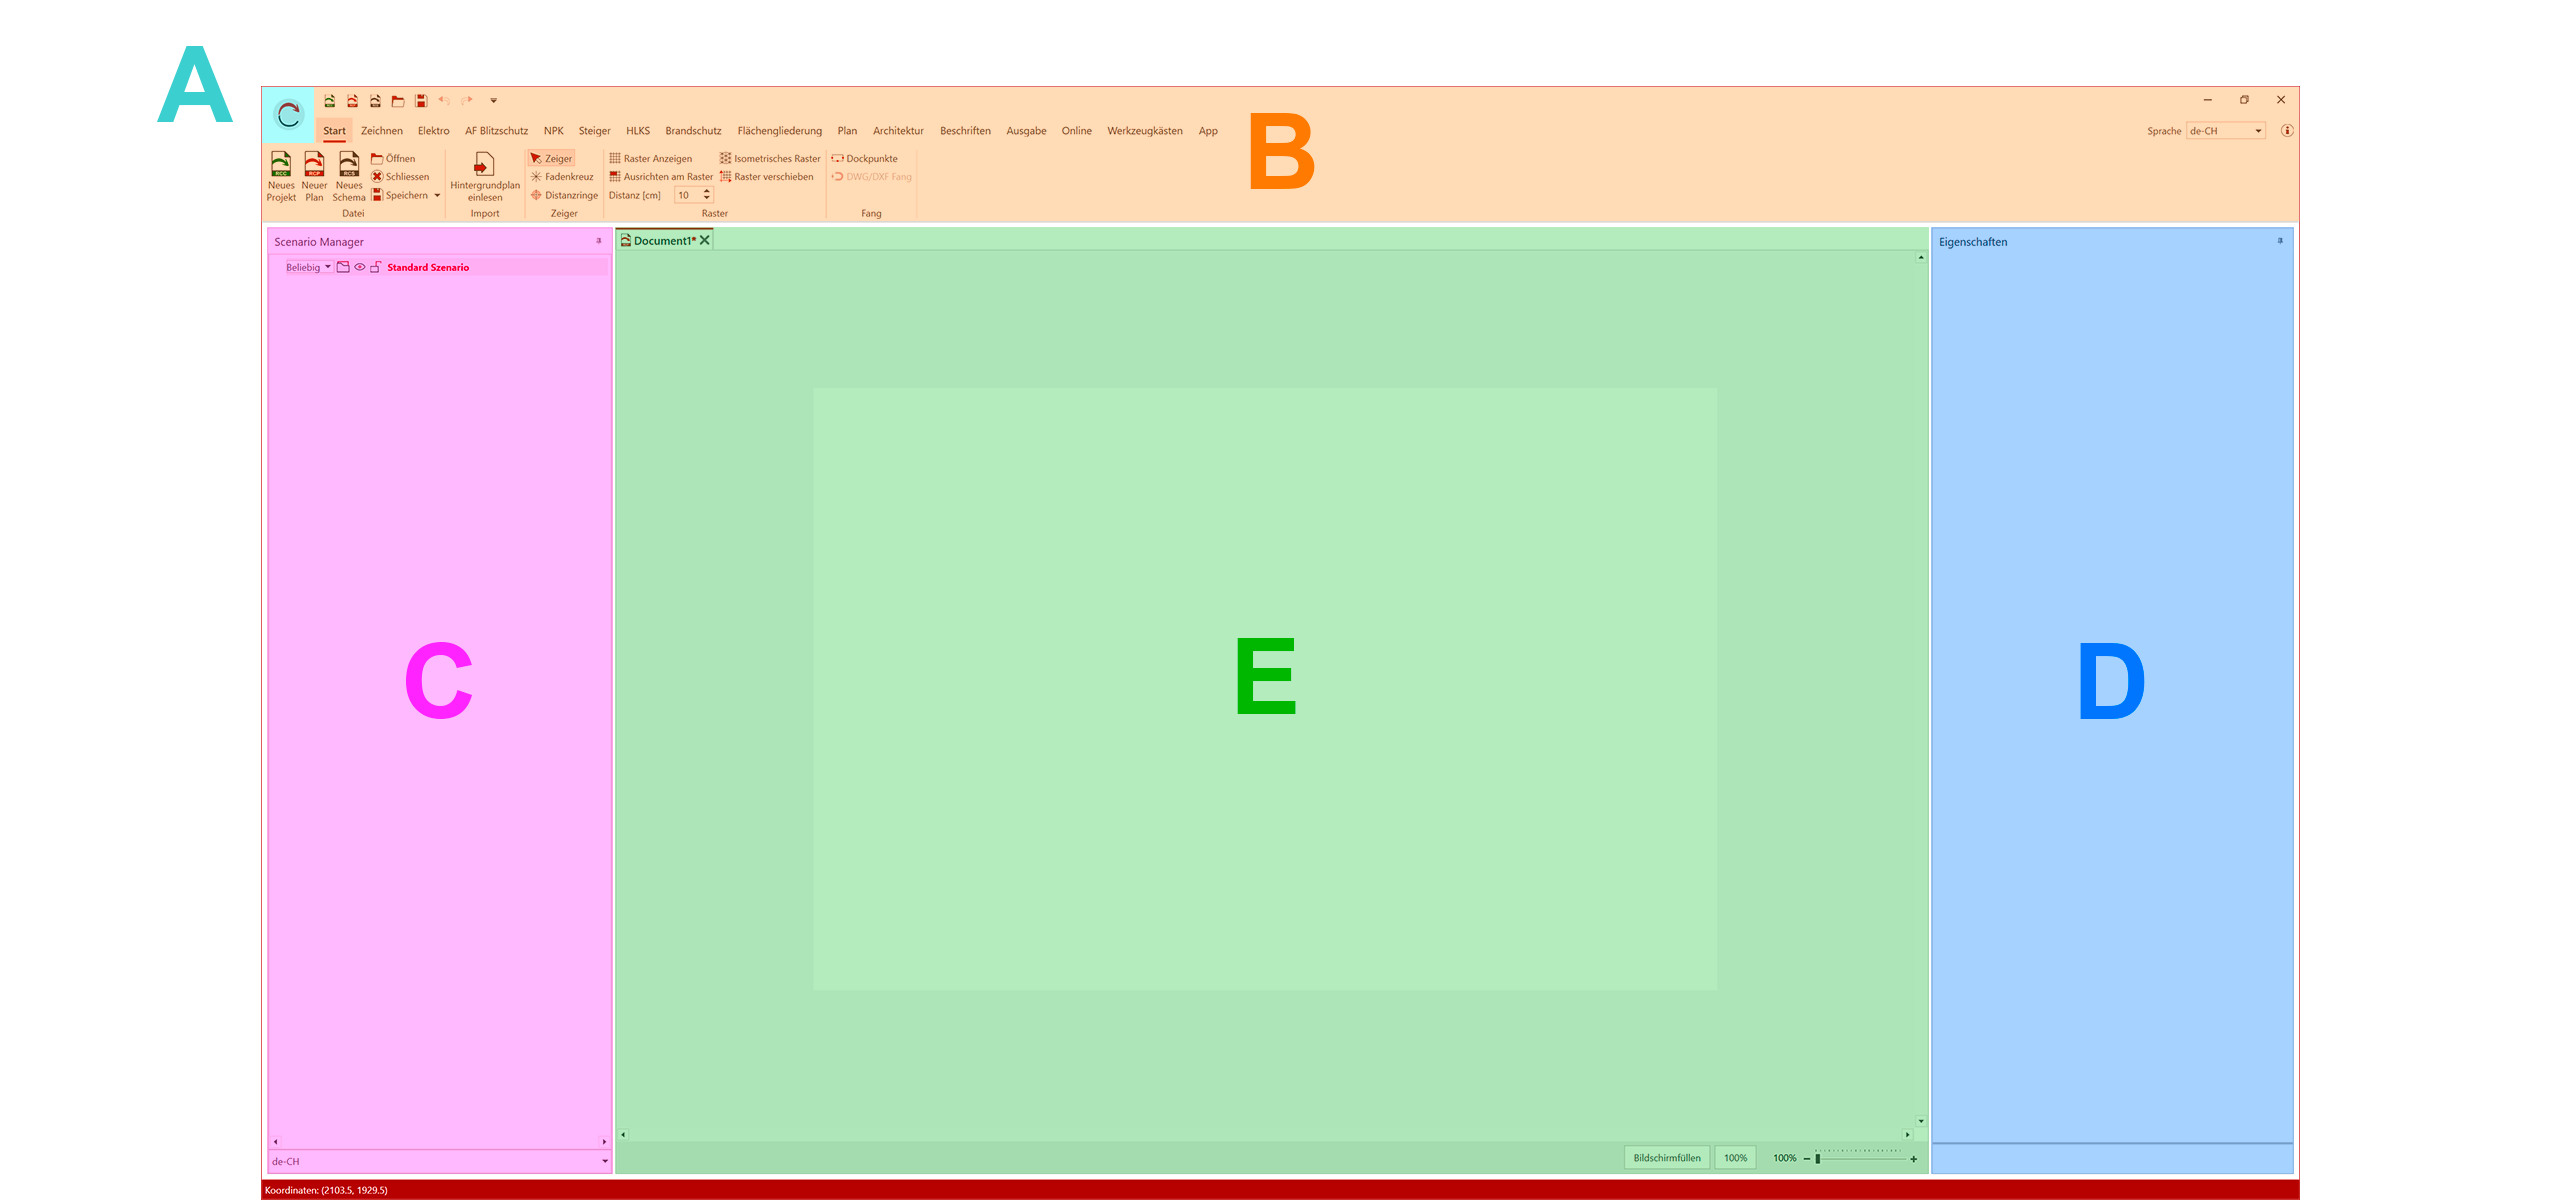
(A) Main Menu - (B) Ribbon including Quick Access Toolbar - (C) Scenario Manager - (D) Properties - (E) Artboard/Workspace
¶ Main Menu
The main menu can be opened via the RED CAD logo in the top left corner.
There you will find program settings, document settings, license information, and much more.
A detailed description of the main menu can be found in the Main Menu section.
¶ Menu/Ribbon
The menu is the main navigation and contains all functions/control panels available in the RED CAD app. The individual functions/control panels are grouped by category within the tabs.
Enable/Disable Auto-Hide:
The auto-hide of the ribbon can be enabled or disabled by double-clicking the tab title.
¶ Quick Access Toolbar
The Quick Access Toolbar is located above the menu by default and is recognizable by its small function icons.
The Quick Access Toolbar can be expanded with additional functions from the menu list to provide faster access to frequently used commands.
Change the Position of the Quick Access Toolbar
- Right-click any tab title.
- Select Show Quick Access Toolbar below the Ribbon
Add Additional Functions to the Quick Access Toolbar
- In the menu bar, navigate to the function you want to add.
- Right-click the function.
- Select Add to Quick Access Toolbar → The function is added to the Quick Access Toolbar
¶ Drawing Area/Workspace
The drawing area/workspace (C) is the area in which you create your drawing.
When you create a new document, a white, empty area of the default size is automatically created.
The size can be adjusted via the Document Settings. If a background plan is imported, the drawing area adjusts automatically.
When project files are open, the project management is also displayed in this area.
¶ Information Bar
The information bar at the bottom of the RED CAD APP displays coordinates, license information, and notes on currently active functions or assistants.
¶ Panel (Window)
Panels are windows for control and editing, e.g., Properties (D) (/de/workspace/properties), Scenario Manager (C) (/de/workspace/scenario-manager), or toolbars. They can be detached from the main view and used as separate windows.
Detach panels from the main view using drag and drop:
- Left-click and hold on the panel title.
- Drag the panel to the desired position (e.g., to a second monitor).
- Release the left mouse button.
Attach panels to the main view using drag and drop:
-
Left-click the panel title and hold it down.
-
Drag the panel toward the drawing area → The selection field appears in the workspace
-
Move the mouse pointer to the desired screen position in the selection field → The panel will be displayed transparently at the target position
-
Release the left mouse button to pin the panel to the main view.
Enable Auto-Hide:
Auto-Hide is only available when the panel is pinned to the main view.
With Auto-Hide, a panel automatically collapses as soon as the mouse pointer leaves the window. You can enable or disable this mode using the pushpin icon in the top right corner of the pane